
A face frame is the part of a cabinet that people actually look at. It covers the raw edges of the plywood box, gives the doors something to close against, and decides whether the finished piece reads as furniture or as a box you built in a garage. I build mine with pocket holes. Not because it is the only way and not because it is the fanciest way, but because it is fast, it is strong enough for anything I am likely to build, and it does not need a mortiser or a shop bigger than the 12 by 20 foot garage behind the house. The tool that does the work on my bench is the Kreg R3 Pocket-Hole Jig System, which lives in a compact carrying case on a shelf until I need it.
Most of the frames I build go on shop cabinets, a bathroom vanity, and the built-in bookshelves in the front room. The same five steps work for a full run of kitchen cabinets if you ever get that ambitious, though I would want a second person for that job. What follows is the order I actually do things in, including the parts I got wrong for the first few years. It assumes 3/4 inch stock, which is what nearly every face frame is made from, and it assumes you are working alone in a small shop, because that is the situation I know.
The jig holds the angle. You hold the drill.
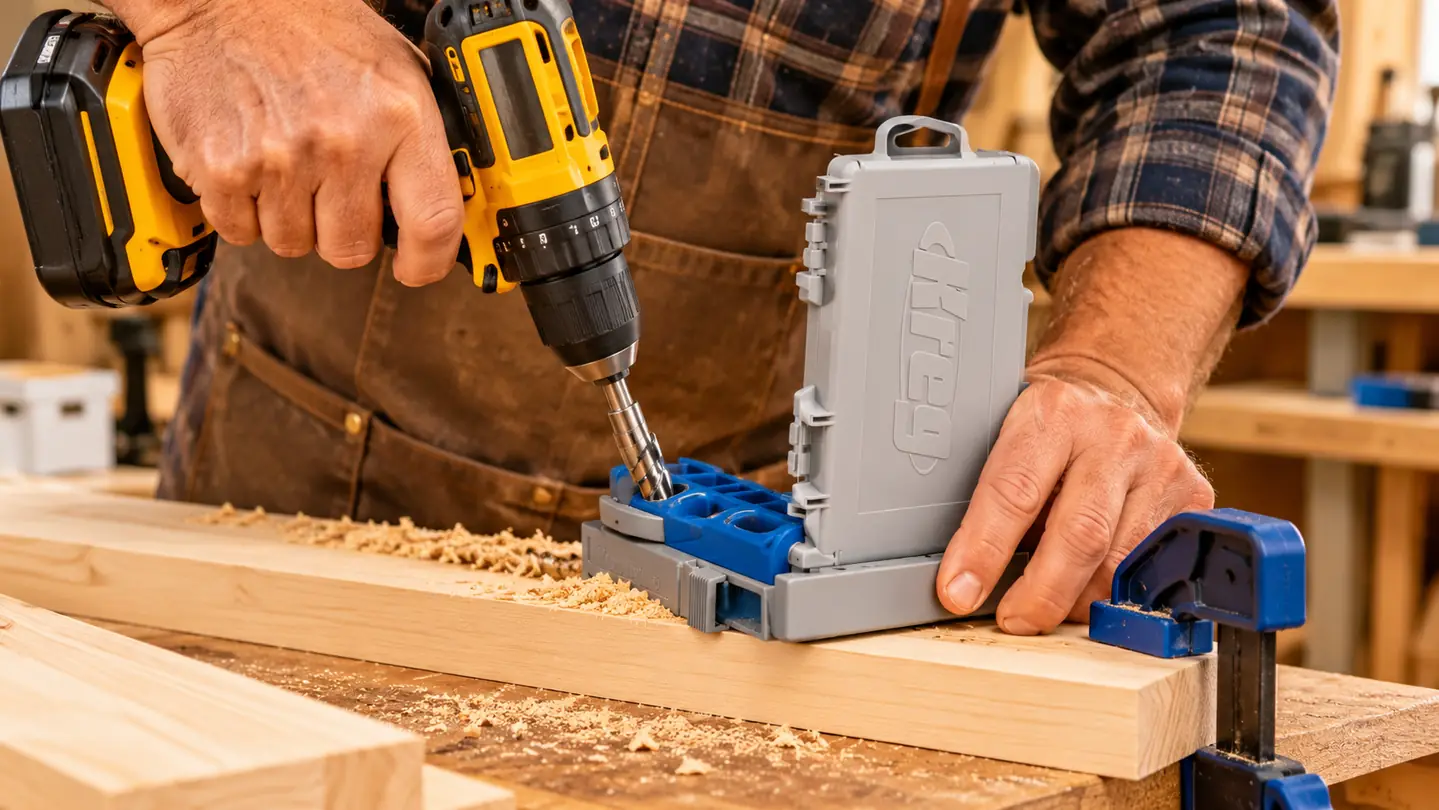
The Kreg R3 drills angled pocket holes in material up to 1-1/2 inches thick, with nine depth settings on the positioning sliders and a clamp adaptor that works with most clamps. It weighs 1.3 pounds, and the compact case holds a 6 inch driver bit, a depth collar, an Allen wrench, and a clamp pad.
Amazon Check today's price on Amazon →What the Jig Does, and What You Still Have to Do
A pocket hole is an angled hole drilled into the end of one board that meets a straight pilot hole in the face of the mating board. A stepped bit bores both in one pass and a self-tapping washer-head screw pulls the joint tight. The jig's only job is to hold that bit at the correct angle and stop it at the correct depth. Everything else is on you: holding the drill straight, clamping the two boards so they cannot slide, and checking the assembly for square before the glue sets up.
What comes in the case is the jig itself, a 6 inch driver bit, a depth collar, an Allen wrench, a clamp pad, and the compact carrying case. What does not come in the case is the clamp. The jig has a clamp adaptor that lets the drill guide work with most clamps you probably already own, but you will need one, and it needs to hold the jig down hard against the work. A loose jig drills a hole in the wrong place, and a hole in the wrong place is not something you can quietly fix on a finished face frame.
Step 1: Draw the Frame Before You Cut Anything
A face frame is stiles and rails. The stiles run vertically, the rails run horizontally between them, and the openings they create are what your doors and drawer fronts cover. I draw the whole front elevation on a sheet of paper, full size if it fits and at half scale if it does not, and I write the opening sizes on it. Working backward from the door size is easier than working forward from the cabinet, because the door is the thing you have to buy or build.
For a half inch overlay door, the opening wants to be about an inch wider and an inch taller than the door, since the door covers a half inch on all four sides. For inset doors the opening is the door, exactly, and you should not attempt inset doors on your first face frame. I did, on that vanity, and I spent a Saturday with a block plane making a door fit an opening I had cut to the wrong number.
Write the cut list, cut everything a hair long, and label each piece with a pencil on the face that will end up against the cabinet box. That labeled face is your reference face for the rest of the job. Lose track of which face is which and you will drill pocket holes on the show side, which is the mistake that turns a two hour job into a four hour job with a plug cutter involved.
Step 2: Set the Jig for Your Stock Thickness
Set the jig once and test it on scrap. On the Kreg R3 the positioning sliders have nine depth settings so you can match the jig to the material, and the depth collar on the drill bit controls how deep the bit travels. The collar locks with the Allen wrench that comes in the case. For 3/4 inch stock I set it, drill two test holes in a scrap of the same red oak or plywood I am using, and drive a screw into a second scrap to watch the joint close.
Screw length matters as much as the setting. 3/4 inch stock takes a 1-1/4 inch pocket screw. Fine thread for hardwood, coarse thread for softwood and plywood. If the screw point breaks through the show face, the screw is too long. That is not the jig's fault and no amount of adjusting the collar will fix it. Stop and get the right screws.
This is also the moment to check the drill. A drill with a half inch chuck is what the jig is built to accept, and that covers every drill I own. What you want is steady, not fast. Too much speed burns the bit and packs the flutes with chips, and a packed flute is what makes a hole wander.
The jig is not what fails on a face frame. The layout is. Two pocket holes in a 2 inch rail will hold for decades. Two in a 4 inch rail will let the joint creep open by the second winter.
Step 3: Drill the Pockets on the Back Face
Pocket holes go in the ends of the rails, drilled from the back face of the frame. Done that way, the pocket and the screw head end up inside the cabinet where nobody sees them. Lay the rail flat with the back face up, clamp the jig down, and drill. The jig sits on the workpiece and the bit passes through its guide at a fixed angle, so the only thing you have to control is keeping the drill body level and letting the bit do the work.
Two pockets per joint on rails up to about 2-1/2 inches wide. Three on anything wider. Space them evenly and keep them off the very edge. Back the bit out once or twice per hole to clear chips, because a packed flute overheats and a hot bit wanders. I keep the shop vac nozzle near the work while I drill, mostly because walnut dust and I have a long history.
Drill every piece before you glue anything. Every single one. Then lay the whole frame out dry on the bench and look at it. It is a lot easier to discover a rail is 1/8 inch short when nothing is stuck together yet.
Step 4: Glue, Clamp, and Drive the Screws
Spread glue on the end grain and on the mating face. End grain soaks it up, so put a little extra on the end and give it a moment before you assemble. Bring the joint together by hand first, then drive the screw. The screw pulls the joint closed the rest of the way, and if you have clamped it right it pulls the two faces flush instead of lifting one of them.
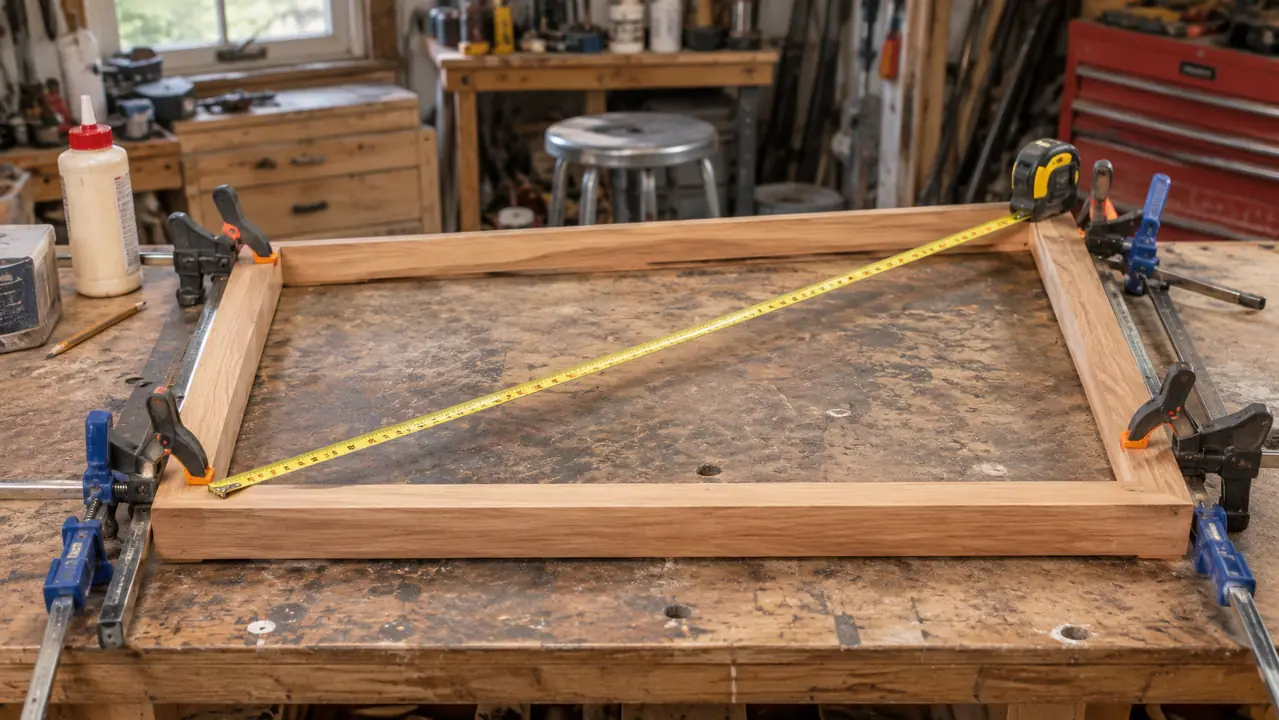
Assemble on a flat surface. My bench is flat because I built it that way, and I still lay a piece of melamine on top when I glue up a frame. A face frame that dries out of plane is a face frame you will be flattening an hour later with a hand plane and a straightedge, and you will not enjoy it.
Check the diagonals before the glue sets. Measure corner to corner one way, then the other. If the two numbers match, the frame is square. If they do not, rack it until they do, then put a clamp across the long diagonal and leave it. A cabinet with a frame that is 1/8 inch out of square will never hang right and the doors will fight you for the life of the piece.
Step 5: Attach the Frame to the Box
Drill pocket holes in the back face of the finished frame, on the inside edges, so you can drive screws from inside the cabinet box out into the frame. Two per stile and two per rail is plenty on a typical cabinet. Line the frame up so it overhangs the box by the amount your doors need, clamp it, and check the overhang on all four sides before you drive a single screw.
Glue is optional here. I glue it if the cabinet will never come apart and skip the glue if it might. The pocket screws alone will hold the frame to the box for the life of the piece, and if you ever have to pull it off, you will be glad you skipped the glue.
Then plug the pockets if they show. With the back-of-frame approach they usually do not, which is one of the reasons I like it. On a frame where the pockets do face out, glue in a plug, cut it flush with a fine saw, and sand it. Do that before you finish, and do the first one on a scrap so you can see how the plug sits before you commit.
What Else Helps
A clamp you trust, and really two of them. One to hold the jig, one to hold the joint. The jig's clamp adaptor covers most clamps, but a cheap clamp that slips under pressure will ruin more joints than a dull bit ever will.
A flat assembly surface and a square you have actually checked. Plenty of framing squares are not square out of the package. Test it against a known straight edge and file the inside edge if you have to. A square that lies to you is worse than no square at all.
Scrap of the same species. Pocket screws and glue behave differently in red oak than they do in pine, and a test joint costs you three minutes. I keep a bin of offcuts from every project for exactly this, and it has saved me more than once.
And patience at the drill. The biggest improvement to my pocket hole work came from slowing down. Steady pressure, clear the chips, do not force the bit. The jig will do its part if you let it.
Five steps, one small jig, and a frame that stays square.
The Kreg R3 handles 3/4 inch stock and everything up to 1-1/2 inches, sets with nine depth settings on its positioning sliders, and packs back into a case that fits in a drawer when the job is done. For a small shop, that is the whole argument.
Amazon Check today's price on Amazon →