

For most of thirty years my answer to a small joint was glue, a fistful of clamps, and a certain amount of hoping. Some of it held. A bookshelf I built for my daughter's first apartment is still standing in one piece. A birdhouse I made with my grandson Tyler did not survive its first windy March. What finally pushed me toward pocket holes was a face frame on a neighbor's kitchen cabinet that had to come apart and go back together square, in my garage, on a Tuesday evening, with nobody available to hold the other end. The Kreg R3 Pocket-Hole Jig System was the simplest way into that kind of joinery, and it was the only one that would fit in a drawer when I finished with it.
I have run the R3 for months now, on cherry, red oak, pine, and birch plywood, in a twelve by twenty foot garage shop and twice on a neighbor's porch where there is no bench at all. What follows is the honest accounting. It includes the parts that still irritate me, the jobs I would not use it for, and the one mistake that cost me a good board.
The Quick Verdict
A pocket-hole jig that earns its drawer space in a small shop. Set the depth once for the thickness you are using, clamp it down, and it repeats all afternoon. It will not replace a biscuit joiner for edge joints or a mortiser for real mortise and tenon work, and it does not pretend to.
Amazon Check Today's Price →The joint that stopped needing four hands
One clamp, one drill, and a case the size of a lunchbox. Nine depth settings cover the stock most home shops actually buy.
Amazon Check Today's Price on Amazon →How I've Used It
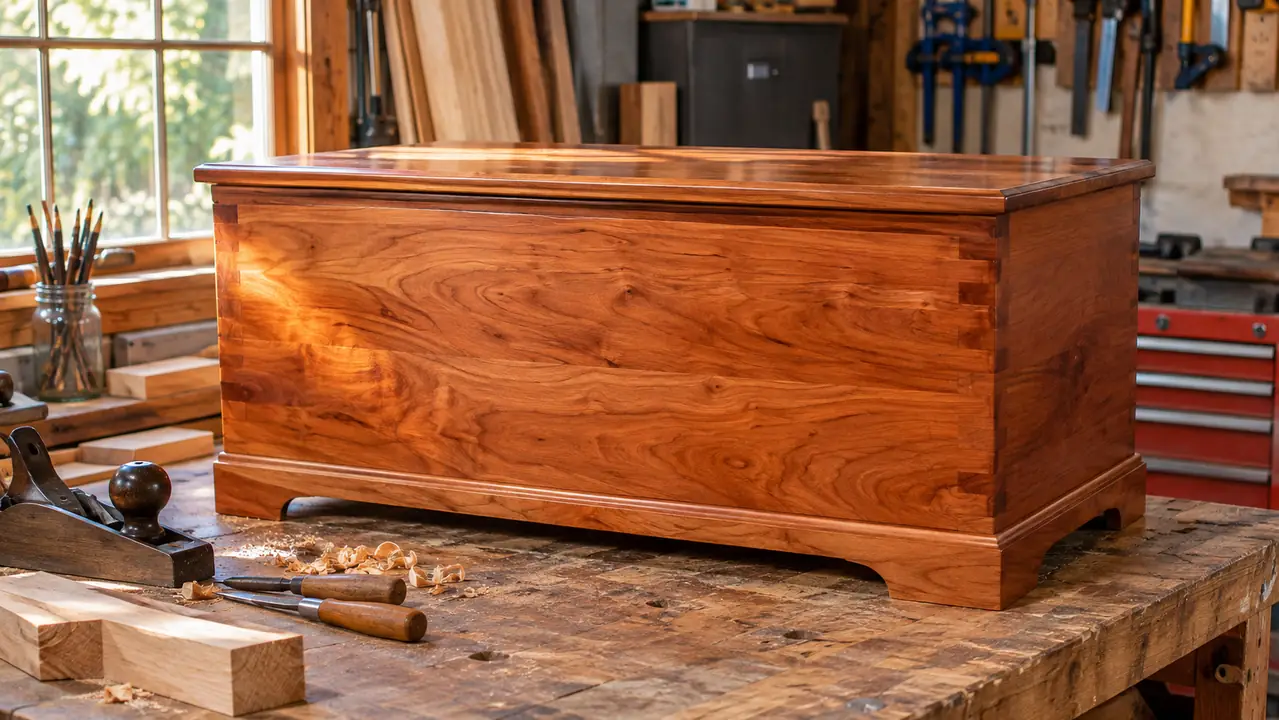
The first real job was a cherry blanket chest that had been a stack of rough boards under my bench for two winters. I built the carcass with pocket screws at the corners and hid every one of them under a face frame and a top. Cherry is not forgiving about tear-out, and I was nervous the first time I put a bit into it. But the drill guide holds the bit at a fixed angle and the depth collar stops it from punching through the show face. That is the entire argument for the tool, and it fits in one sentence.
Since then the list has been two end tables, a bookshelf, a run of shop cabinets from birch plywood, and whatever repair a neighbor carries over. A kitchen chair with a split rail. A drawer box that had come apart at the corner. Most of those took fifteen minutes of actual work and twenty minutes of finding the right clamp, which is the true ratio in a small shop. The bookshelf was for Jen's hallway, five feet tall, built from one sheet of birch plywood with pine face frames. Cutting the parts took an afternoon. Drilling and assembling took under an hour, and that ratio is why the tool stayed out on the bench for a week instead of going back in the drawer.
Tyler helps on weekends, with safety glasses on and me standing right there. He is twelve, and the division of labor that works is him clamping the jig to the workpiece while I hold the board and run the drill. It is simple enough that a kid can handle the clamping side of it. The drill still needs an adult hand and an adult's full attention, and I do not hand it over.
The porch job is worth mentioning because it proved the portability claim rather than assuming it. A neighbor's gate had sagged and the fix needed a joint that would hold without me dragging a bench across the yard. The whole kit went over in a canvas bag with a cordless drill and one bar clamp. It came out square and I was home before lunch. I measured that gate twice before I drilled, because there was no bench to clamp a mistake to and no second board in the truck. I would not have taken that job with glue and clamps.
What Comes in the Case and How It Clamps Down
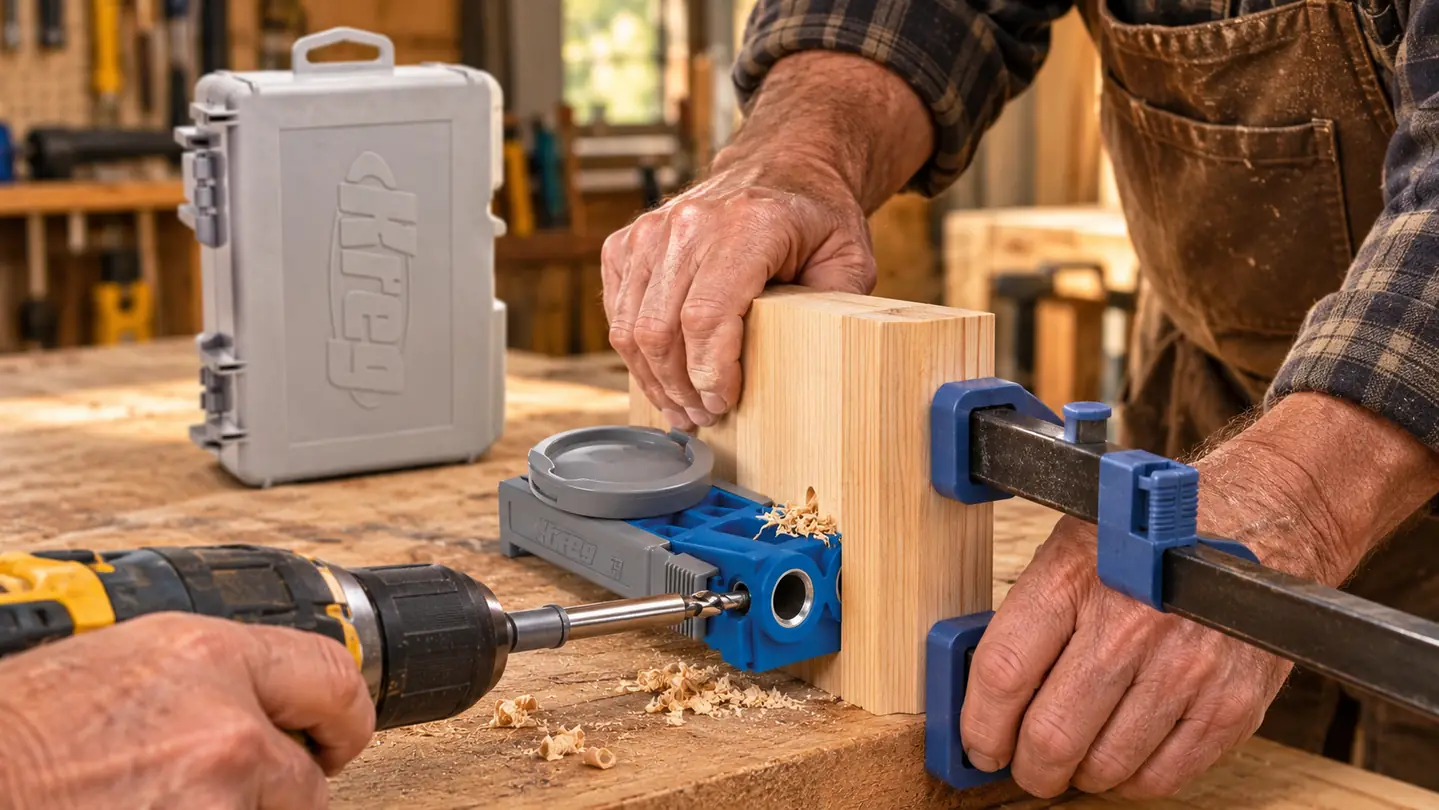
The kit arrives with the R3 jig itself, a six inch (152mm) driver bit, a depth collar, an Allen wrench, a clamp pad, and a compact carrying case. The listing puts the whole thing at 1.3 pounds and eight inches long, two and a quarter wide, and five tall. The body is plastic. That is not a complaint, it is a fact worth knowing before you buy, because it means you set it down carefully rather than tossing it into a bucket of offcuts at the end of the day.
The clamp adaptor is the piece that matters most and the one most people skim past. It lets the drill guide work with most clamps instead of a proprietary one, so the bar clamp already hanging on your pegboard is probably enough. I use a medium bar clamp with the pad under the jaw. Without that pad on softwood, the jaw leaves a mark, and on a finished face the mark is permanent.
The jig registers off the edge of the workpiece, which is why it works on a corner without measuring anything. You set it against the edge, clamp, drill, and move to the next hole. On a cabinet side with six holes, that register is what keeps them in a straight line. If the edge is not square, the holes will not be either, so joint the edge first and thank yourself later.
The listed drilling capacity in wood is 1.5 inches. Everything I have put under it has been thinner than that, mostly three quarter stock and half inch plywood, so capacity has never been my limit. The real limit is how far a workpiece can hang off the bench before it tips. That is a support problem, not a jig problem, and a roller stand solves it.
One more thing about the case, since I know how this goes in a small shop. It has a spot for the collar, the wrench, and the bit, and if you put things back in that spot the next setup takes seconds. If you do not, you spend ten minutes of a Saturday morning hunting a collar the size of a dime. The case is doing more work than it looks like it is doing.
Nine Depth Settings, and Why Material Thickness Is the Whole Game
The positioning sliders have nine depth settings. In practice I use three of them: one for three quarter stock, one for half inch, and one for the occasional piece of five quarter that comes through. The other six exist so the tool covers material most of us will never put under it. That is fine by me. Settings you do not use cost nothing once the tool is sitting on the bench.
The part that is easy to get wrong is that the depth setting, the screw length, and the thickness of the stock all have to agree. Get it wrong on three quarter cherry and the screw exits the show face and takes a divot of wood with it. I did that once, on a maple cutting board an inch and a quarter thick, with the collar still set for three quarter stock from the job before. The screw came out through the top face and lifted a splinter the size of my thumbnail. I plugged it, sanded it flush, and gave the board to the shop instead of the kitchen, which is where mistakes go to live out their lives. I have checked the collar against a scrap of the same thickness every time since.
The routine now takes about thirty seconds. Clamp a scrap of the same thickness, drill one hole, hold the screw up against the pocket, and only then commit to the real piece. It has saved me more boards than any other habit in the shop. If you take one thing from this review, take that one.
Where the R3 Fights Me
It is a small jig with a small footprint, so on a long board you are balancing the work, the tool, and the clamp at the same time. On a two foot end table apron that is fine. On an eight foot shelf it is not. The shelf in question was eight feet of pine for Carol's pantry, and the first hole went in clean. On the second one the far end lifted off the bench and the whole board pivoted on the clamp. Nothing was damaged except my opinion of my own setup. A roller stand under the overhang fixed it, and now I set one up before the first hole instead of after the third.
Dust is the second thing, and it surprised me. The bit makes a real pile of chips and some of them end up inside the pocket. I keep the shop vac nozzle in my left hand and blow each hole out before the screw goes in. Skip that and the screw compresses chips instead of wood, and the joint is not as tight as it looks from the outside. The portable dust collector in the corner does nothing for this. It is a five second job with a nozzle.
The third is pace. One hole, reposition, clamp, drill, repeat. A cabinet's worth of face frames is a couple of hours of that. None of it is difficult and none of it is fast. I would rather tell a beginner that now than have him wonder where his Saturday went.
The fourth is the plastic body. It has held up fine over months of use, but it does not want to be knocked off a bench onto a concrete floor, and in a garage shop things get knocked off benches. Mine lives in its case and the case lives in a drawer. That is not much of a hardship. It is a habit the tool asks for, and I have gotten into it.
After Months, Would I Buy It Again
Yes, I would buy it again, and I would buy it earlier. I spent years working around not having it and the workarounds were worse than the tool. Last month it was five shop cabinet doors, frame and panel, and every rail got two pockets at each end. The whole run took a morning including the clamping, and every door came out square enough that I did not have to fight it into the opening. It has not replaced my biscuit joiner for edge joints on wide panels, and it will never do what a mortiser does with a real mortise and tenon. What it does is make a strong, square, repeatable corner in about a minute, on stock from half inch up to what that 1.5 inch drilling capacity covers, without needing a second person in the shop.
Kreg has been making this pattern for a long time and the R3 is the small version of it. The larger bench model exists for people who drill a hundred holes a week. I do not, and I was not willing to give up the bench space. If you are drilling at that volume, the bigger one is the honest answer and I would tell you so.
If I could change one thing, it would be the clamp pad. It works, and it protects the work, but it is a small separate piece and I have set it down and lost track of it twice. A pad that stayed attached to the jig would suit a shop like mine better. That is a small complaint about a tool that has otherwise done exactly what it said it would.
What I Liked
- Sets up in seconds once the depth collar is dialed in for your stock
- Nine depth settings cover the thicknesses most home shops actually use
- Clamp adaptor works with most bar clamps, so there is no proprietary clamp to buy
- 1.3 pounds in a compact case that fits a drawer or a toolbox
- Pulls a corner square without a second pair of hands in the shop
Where It Falls Short
- Small footprint means long boards need support on the outfeed side
- One hole at a time, so a run of face frames is slow going
- Plastic body wants careful handling in a shop full of offcuts
- Chips pack into the pocket if you do not blow them out before driving the screw
- The six extra depth settings are mostly for material you will never touch
Thirty seconds with a scrap of the same thickness has saved me more boards than any other habit in the shop.
Who This Is For
This is for the home shop woodworker in a garage or a basement, the one whose bench is also the outfeed table and whose whole clamp collection is four bar clamps and a spring clamp. It is for boxes, cabinets, face frames, drawer boxes, shop jigs, and repairs. It is for the person who already owns a cordless drill and a bar clamp and does not want to buy a proprietary clamp system on top of the jig. Kreg built this one around the clamps you already have, and that is most of why it stays on my bench instead of going into the drawer with the things I regret.
Who Should Skip It
Skip it if you are building fine furniture with exposed joinery, because you will not want a pocket screw anywhere near a show surface and hiding them costs more work than cutting a proper joint in the first place. Skip it if you drill hundreds of holes a week, because the one at a time pace will wear you down and the bench model is the right tool for that. Skip it if your work is mostly long boards and you have no outfeed support, because you will fight the setup more than you fight the joint. And skip it if you want one tool that does everything. This one does a narrow thing well and stops there.
Set the collar once and stop wrestling the clamps
Nine depth settings, one bar clamp, and a case that fits in a drawer. Check the current listing and the buyer questions before you commit.
Amazon Check Today's Price on Amazon →